AWS Lambda Setup from Scratch: TypeScript Without any Frameworks
A Quick Guide to Setting Up AWS Lambda with TypeScript and ESBuild - From Scratch, Without Frameworks, in Under 2 Minutes
Published by Carlo van Wyk on March 9, 2025 in AWS

TypeScript is a popular choice for AWS Lambda thanks to its strong community support with NPM packages, widespread adoption among developers, and the Node runtime being performant on AWS Lambda.
In this tutorial, I'll show you how to set up AWS Lambda with Typescript and ESBuild in under 2 minutes without any frameworks.
Why ESBuild?
- Best performance
ESBuild is one of the fastest JavaScript and TypeScript bundlers available, significantly reducing build times compared to alternatives like Webpack or Parcel. - Tree-Shaking & Minification
It efficiently removes unused code and optimizes your Lambda package size, leading to faster cold starts and lower execution costs. - First-Class TypeScript Support
ESBuild compiles TypeScript natively without requiring additional transpilers like tsc, streamlining the build process.
Step 1: Create a New Directory for Your Project
bash
mkdir -p typescript-lambda/src && cd typescript-lambdaStep 2: Initialize a package.json with npm init
bash
npm init -yStep 3: Install Required npm packages
bash
npm i typescript @types/node@latest esbuild esbuild-node-externals @types/aws-lambda -DStep 4: Initialize a tsconfig.json file
bash
npx tsc --init --target ES2020 --module commonjs --declaration false --esModuleInterop --forceConsistentCasingInFileNames --outDir ./dist --strict --skipLibCheck --baseUrl "src"Step 5: Create the Lambda
src/index.ts
import { Context } from 'aws-lambda';
import { LambdaEvent } from '@interfaces/lambdaEvent';

export const handler = async (event: LambdaEvent, context: Context) => {
  const { functionName } = context;

  const { action, data } = event;

  console.log(
    `Lambda event received for ${functionName}. action=${action}, data=${data}`,
  );
};
src/interfaces/lambdaEvent.ts
export interface LambdaEvent {
  action: string;
  data: string;
}
Step 6: Create a Bash Script to Build and Zip the Lambda
build.sh
#!/bin/bash

# clear previous zip
rm lambda.zip

# npm install
npm i

# build
npm run build

# only install production dependencies for production build
npm install --omit=dev

# zip index.js
cd dist && zip -r ../lambda.zip index.js && cd ..

# zip node_modules
zip -r lambda.zip node_modules/ -g

# install all dependencies again to ensure vs.code resolves them
npm i

echo "✅ build completed. zipped lambda.zip"
bash
sudo chmod +x build.shStep 7: Create an Execution Role for the Lambda in AWS
AWS CLI
aws iam create-role \
  --role-name TypescriptLambdaExecutionRole \
  --assume-role-policy-document '{
    "Version": "2012-10-17",
    "Statement": [
      {
        "Effect": "Allow",
        "Principal": {
          "Service": "lambda.amazonaws.com"
        },
        "Action": "sts:AssumeRole"
      }
    ]
  }'
AWS CLI
aws iam attach-role-policy \
  --role-name TypescriptLambdaExecutionRole \
  --policy-arn arn:aws:iam::aws:policy/service-role/AWSLambdaBasicExecutionRole
Step 8: Get the Execution Role ARN
AWS CLI
aws iam get-role --role-name TypescriptLambdaExecutionRole --query "Role.Arn" --output textStep 9: Deploy the Lambda to AWS
AWS CLI: Create the Lambda
aws lambda create-function \
  --function-name TypescriptLambda \
  --runtime nodejs20.x \
  --role arn:aws:iam::1234567-your-account-id:role/TypescriptLambdaExecutionRole \
  --handler index.handler \
  --zip-file fileb://lambda.zip \
  --region us-east-1
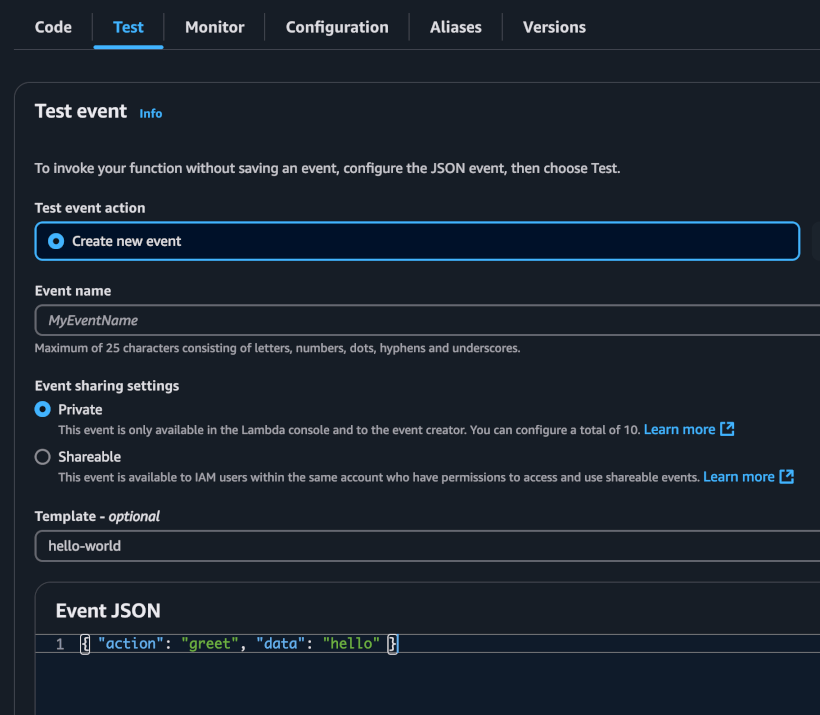
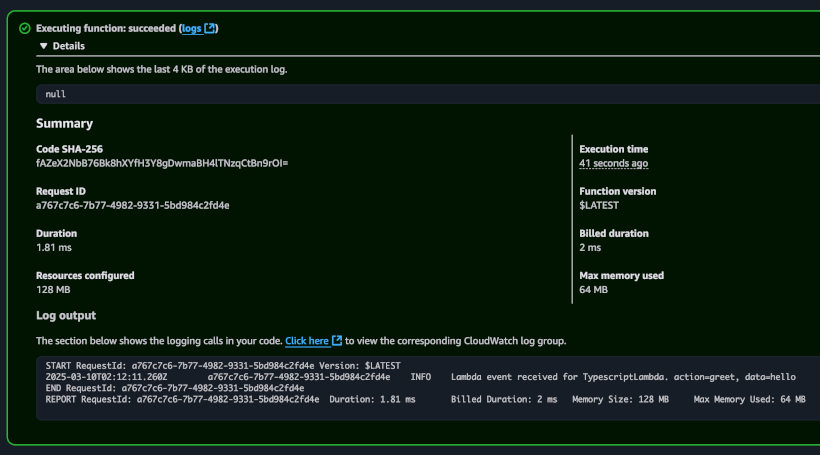
Step 10: Invoke The Lambda on the AWS Console
AWS Lambda Payload
{
    "action": "greet",
    "data": "hello"
}

Code
Clone the Github repository: https://github.com/thecarlo/typescript-lambda-no-frameworks