Develop Locally with HTTPS, Self-Signed Certificates and ASP.NET Core
A Detailed Guide to Setting up HTTPS and Self-Signed Certificates on Your Local Development Environment for ASP.NET Core on Windows, Mac OSX and Linux
Published by Carlo van Wyk on August 7, 2017 in ASP.NET Core
Note : This post and the GitHub repo has been updated with examples for ASP.NET Core 2.0
In this tutorial, I’m going to show you how to set up a local development environment that uses HTTPS with ASP.NET Core 2.0 on Windows, Mac OSX and Ubuntu Linux. I’ll show you how to create self-signed certificates and add them to your trusted root certificate store in order to get rid of the annoying browser messages. And finally, I’ll cover how to setup Kestrel, the built in web server for ASP.NET Core, to use HTTPS.
Creating self-signed certificates, trusting them, and getting rid of browser warnings is filled with lots of nuances, and the process of creating self-signed certificates is poorly documented on the internet. Installing certificates on Windows and Linux involves completely different processes, but it's become essential in the ASP.NET Core world where cross platform development is an integral part of the development process. Then there's the ubiquitous and ever annoying “your connection is not secure” message in Chrome, Chrome messages relating to common name matching in certificates and specifics around configuring HTTPS in ASP.NET Core and Kestrel.
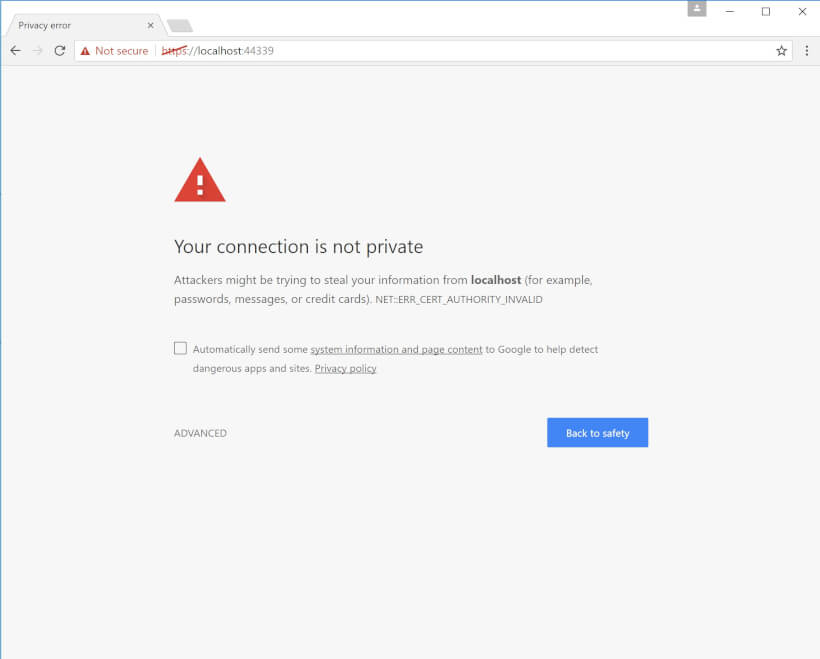
I've lost count of the number of times I've had to google this process, so I figured it would be a good idea to create a guide that covers everything in detail for both Windows and Linux.
Why HTTPS?
If you're a developer that doesn't know how to implement HTTPS, you’re lacking a critical skill. The internet as we know it is moving rapidly towards an era where all traffic will be served over HTTPS. As things stand today, HTTPS is already ubiquitous. The sites you use every day such as Google, Facebook, Microsoft, your banking sites - even this site - they’re all using HTTPS.
If you’ve developed apps in the last 2 - 3 years, it’s highly likely that the production version of your web application is running in HTTPS. Going forward, it’s a given that the overwhelming majority of sites will use HTTPS.
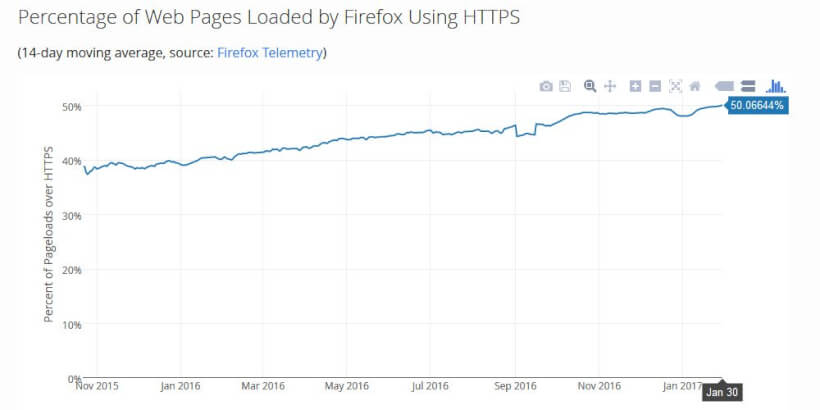
More than 50% of all page views on the internet is already being served over HTTPS, and with Google Chrome's eventual objective to mark all HTTP sites as insecure, it's only a matter of time before the overwhelming majority of traffic will be served over HTTPS.
Last, but certainly not least: all communications over HTTPS are encrypted. This means nobody can snoop your traffic.
A Brief Explanation of Certificates and Why You Need a Self Signed Certificate for Local Development
Certificates and HTTPS is a huge topic and even a brief explanation would be quite involved. But let’s look at some concepts on a very high level around issuing certificates for the purposes of this tutorial.
Every time you visit an HTTPS site, your browser downloads the site’s certificate, containing a public key of the server that the site is hosted on, signed with a private key of the Certificate Authority (CA).
Your operating system (OS) comes with a list of trusted root CA’s which are pre installed. Browsers use these list of root CA’s to validate the certificate against. This is done by verifying that the public key in the certificate that your browser downloaded from the site is signed by the CA that issued that certificate.
The certificate also contains the domain name of the server and is used by your browser to confirm that site that the browser is connected to is the same as the site listed in the certificate issued by the CA. Following that, encryption takes place which is a topic outside of the scope of this tutorial.
Since we don’t use certificates issued by CA’s for local development, we can issue a self-signed certificate and then add this self-signed certificate to our trusted root certificate authority store. This way, your browser will trust the certificate.
On the Security of Self-Signed Certificates
Self-signed certificates offer encrypted communication over HTTPS just like certificates issued by a Certificate Authority (CA) does, at least once the connection is made. This in itself does not make self-signed certificates secure.
For example, self-signed certificates are vulnerable to man in the middle attacks if they are not properly installed and trusted. Since the only way to trust a self-signed certificate is to manually import the certificate in the trusted root CA store for every device visiting the site, self-signed certificates are effectively insecure by default, and this is one of the main reasons you should never use self-signed certificates in production.
On the localhost we don’t have the same security requirements as a public facing site does. Therefore, using a self-signed certificate for local development serves the primary purpose of being able to develop locally using HTTPS.
Create a Self Signed Certificate and trust it on Windows
Creating a self-signed certificate with ASP.NET Core in Windows is pretty easy in Powershell. I’ve written a Powershell script that takes care of everything.
Simply open up Powershell with administrator privileges, set the password for your certificate in the script, and run the script.
# setup certificate properties including the commonName (DNSName) property for Chrome 58+
$certificate = New-SelfSignedCertificate `
    -Subject localhost `
    -DnsName localhost `
    -KeyAlgorithm RSA `
    -KeyLength 2048 `
    -NotBefore (Get-Date) `
    -NotAfter (Get-Date).AddYears(2) `
    -CertStoreLocation "cert:CurrentUser\My" `
    -FriendlyName "Localhost Certificate for .NET Core" `
    -HashAlgorithm SHA256 `
    -KeyUsage DigitalSignature, KeyEncipherment, DataEncipherment `
    -TextExtension @("2.5.29.37={text}1.3.6.1.5.5.7.3.1")
$certificatePath = 'Cert:\CurrentUser\My\' + ($certificate.ThumbPrint)

# create temporary certificate path
$tmpPath = "C:\tmp"
If(!(test-path $tmpPath))
{
New-Item -ItemType Directory -Force -Path $tmpPath
}

# set certificate password here
$pfxPassword = ConvertTo-SecureString -String "YourSecurePassword" -Force -AsPlainText
$pfxFilePath = "c:\tmp\localhost.pfx"
$cerFilePath = "c:\tmp\localhost.cer"

# create pfx certificate
Export-PfxCertificate -Cert $certificatePath -FilePath $pfxFilePath -Password $pfxPassword
Export-Certificate -Cert $certificatePath -FilePath $cerFilePath

# import the pfx certificate
Import-PfxCertificate -FilePath $pfxFilePath Cert:\LocalMachine\My -Password $pfxPassword -Exportable

# trust the certificate by importing the pfx certificate into your trusted root
Import-Certificate -FilePath $cerFilePath -CertStoreLocation Cert:\CurrentUser\Root

# optionally delete the physical certificates (don’t delete the pfx file as you need to copy this to your app directory)
# Remove-Item $pfxFilePath
Remove-Item $cerFilePath
Create a Self-Signed Certificate and trust it on Mac OSX
Create a config file for your certificate :
sudo nano localhost.confPaste the contents into the conf file and save the file
[req]
default_bits       = 2048
default_keyfile    = localhost.key
distinguished_name = req_distinguished_name
req_extensions     = req_ext
x509_extensions    = v3_ca

[req_distinguished_name]
countryName                 = Country Name (2 letter code)
countryName_default         = US
stateOrProvinceName         = State or Province Name (full name)
stateOrProvinceName_default = New York
localityName                = Locality Name (eg, city)
localityName_default        = Rochester
organizationName            = Organization Name (eg, company)
organizationName_default    = localhost
organizationalUnitName      = organizationalunit
organizationalUnitName_default = Development
commonName                  = Common Name (e.g. server FQDN or YOUR name)
commonName_default          = localhost
commonName_max              = 64

[req_ext]
subjectAltName = @alt_names

[v3_ca]
subjectAltName = @alt_names

[alt_names]
DNS.1   = localhost
DNS.2   = 127.0.0.1
Ensure the OpenSSL library is installed on Max OSX.
Run the following command to check if OpenSSL is installed:
which opensslIf OpenSSL is not installed, install OpenSSL with homewbrew:
brew install opensslRun the following 2 commands using OpenSSL to create a self-signed certificate in Mac OSX with OpenSSL:
sudo openssl req -x509 -nodes -days 365 -newkey rsa:2048 -keyout localhost.key -out localhost.crt -config localhost.conf -passin pass:YourSecurePasswordsudo openssl pkcs12 -export -out localhost.pfx -inkey localhost.key -in localhost.crt
To trust the self-signed certificate on Mac OSX is really easy.
Open the KeyChain Access app (do a spotlight search for KeyChain to find it).
Select System in the Keychains pane, and drag your localhost.pfx certificate into the certificate list pane.
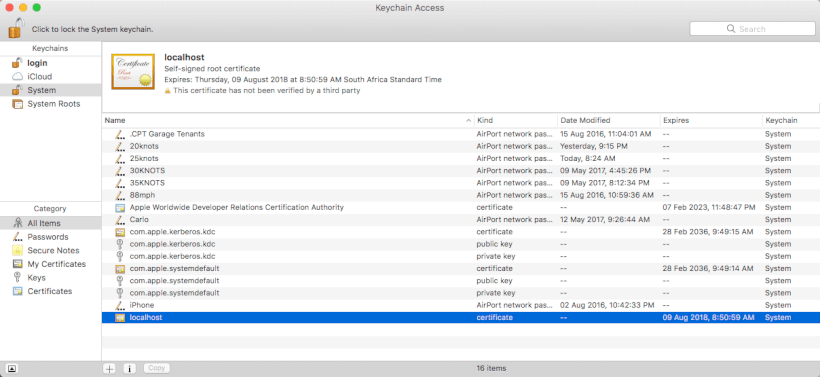
To trust your self-signed certificate, double-click your certificate, and under the trust section select Always Trust.
Create a Self-Signed Certificate and trust it on Ubuntu Linux
Creating a self-signed certificate in Ubuntu Linux is even simpler. All that is required is 2 simple commands to generate the self-signed certificate, and a single command to copy the certificate to your trusted store.
Create a config file for your certificate :
cat << EOL > localhost.conf
[req]
default_bits       = 2048
default_keyfile    = localhost.key
distinguished_name = req_distinguished_name
req_extensions     = req_ext
x509_extensions    = v3_ca

[req_distinguished_name]
countryName                 = Country Name (2 letter code)
countryName_default         = US
stateOrProvinceName         = State or Province Name (full name)
stateOrProvinceName_default = New York
localityName                = Locality Name (eg, city)
localityName_default        = Rochester
organizationName            = Organization Name (eg, company)
organizationName_default    = localhost
organizationalUnitName      = organizationalunit
organizationalUnitName_default = Development
commonName                  = Common Name (e.g. server FQDN or YOUR name)
commonName_default          = localhost
commonName_max              = 64

[req_ext]
subjectAltName = @alt_names

[v3_ca]
subjectAltName = @alt_names

[alt_names]
DNS.1   = localhost
DNS.2   = 127.0.0.1
EOL
Run the following 2 commands using openssl to create a self-signed certificate in Ubuntu Linux :
sudo openssl req -x509 -nodes -days 365 -newkey rsa:2048 -keyout localhost.key -out localhost.crt -config localhost.conf -passin pass:YourSecurePasswordsudo openssl pkcs12 -export -out localhost.pfx -inkey localhost.key -in localhost.crt
When running the export command above, be sure to enter your password when it prompts for an export password. Then, when the export is complete, copy the localhost.pfx to your project's root folder (src/https.web).
Then, run the following certutil command to add the certificate to your trusted CA root store :
certutil -d sql:$HOME/.pki/nssdb -A -t "P,," -n "localhost" -i localhost.crtTo confirm or list the trusted certificates installed with certutil, run the following command :
certutil -L -d sql:${HOME}/.pki/nssdbTo delete the certificate from the trusted CA root store, run the following command :
certutil -D -d sql:${HOME}/.pki/nssdb -n "localhost"Configuring HTTPS in ASP.NET Core 2.0
Once you’ve created a self-signed certificate and trusted the certificate in your root CA store on either Mac, Linux or Windows, the process of configuring ASP.NET Core to use HTTPS is the same.
Start by copying the localhost.pfx certificate you created earlier in Mac, Linux or Windows to the root of your project directory.
Then, create a certificate.json configuration file that contains the certificate filename and password. I prefer keeping this in a separate file as it keeps things separated and simple. ASP.NET Core 2 allows you to configure Kestrel and HTTPS in appsettings.json, but the configuration is more involved and I prefer this method which involves a simpler configuration.
{
  "certificateSettings": {
    "fileName": "localhost.pfx",
    "password": "YourSecurePassword"
  }
}public class Program
{
public static void Main(string[] args)
{
var config = new ConfigurationBuilder()
.SetBasePath(Directory.GetCurrentDirectory())
.AddEnvironmentVariables()
.AddJsonFile("certificate.json", optional: true, reloadOnChange: true)
.AddJsonFile($"certificate.{Environment.GetEnvironmentVariable("ASPNETCORE_ENVIRONMENT")}.json", optional: true, reloadOnChange: true)
.Build();
var certificateSettings = config.GetSection("certificateSettings");
string certificateFileName = certificateSettings.GetValue<string>("filename");
string certificatePassword = certificateSettings.GetValue<string>("password");
var certificate = new X509Certificate2(certificateFileName, certificatePassword);
var host = new WebHostBuilder()
.UseKestrel(
options =>
{
options.AddServerHeader = false;
options.Listen(IPAddress.Loopback, 44321, listenOptions =>
{
listenOptions.UseHttps(certificate);
});
}
)
.UseConfiguration(config)
.UseContentRoot(Directory.GetCurrentDirectory())
.UseStartup<Startup>()
.UseUrls("https://localhost:44321")
.Build();
host.Run();
}
}It's particularly important to remember to explicitly set the Anti forgery token cookie to use a secure cookie.
public void ConfigureServices(IServiceCollection services)
{
    // ...

    services.AddMvc(
        options =>
        {
            options.SslPort = 44321;
            options.Filters.Add(new RequireHttpsAttribute());
        }
    );

    services.AddAntiforgery(
        options =>
        {
            options.Cookie.Name = "_af";
            options.Cookie.HttpOnly = true;
            options.Cookie.SecurePolicy = CookieSecurePolicy.Always;
            options.HeaderName = "X-XSRF-TOKEN";
        }
    );

    // ...
}
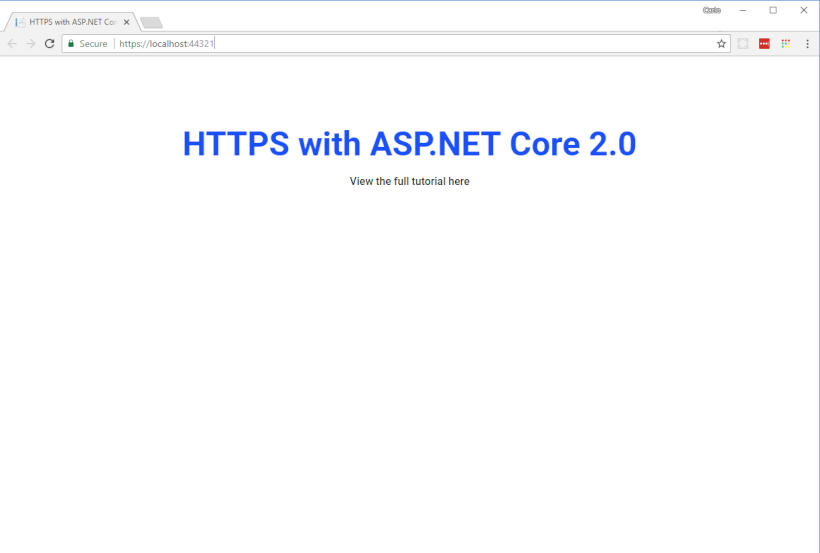
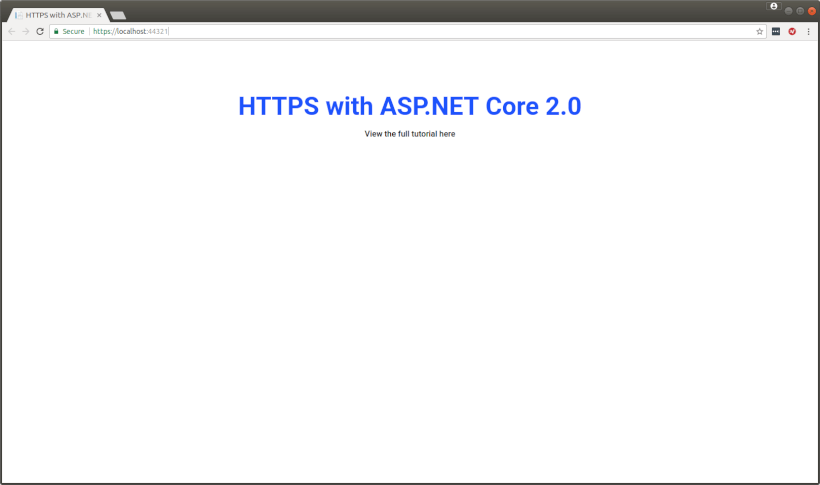
Once you've made the changes, simply build and run the project, and you'll see Chrome open up without any warning messages and showing your site as secure.
If you run into problems, follow the following troubleshooting guidelines
- When launching the project with
F5from Visual Studio Code, ensure that the URL that opened in the browser is https://localhost:44321 and not https://127.0.0.1:44321. There are inconsistencies with the launch URL on Visual Studio Code in Windows, Ubuntu, and OSX. On Windows, the browser launches with localhost, but on Ubuntu, it launches with 127.0.0.1 - Ensure that the
localhost.pfxfile that you generated with your own password is copied to the web project's root folder (src/https.web) - Be sure to close all browser windows after installing the certificate so that the new certificate can take effect in Chrome
- On Windows, HTTPS certificates are already installed for localhost if IIS Express is installed. It's a good idea to remove these certificates, or any other localhost certificates first before installing the new certificates.
Removing Existing Certificates on Windows
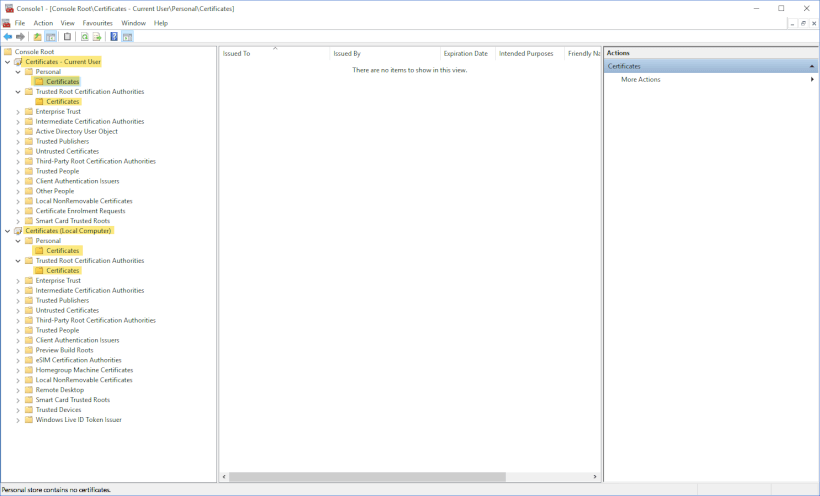
To remove existing certificates, open up the Microsoft Management Console and add the Certificates snap-in for Current User and for Local Computer.
Then, remove the localhost certificates from the locations as highlighted below before adding your own certificates as outlined in this tutorial.
Code
Clone the Github repository: https://github.com/thecarlo/https-with-asp-net-core